
September 24, 2026
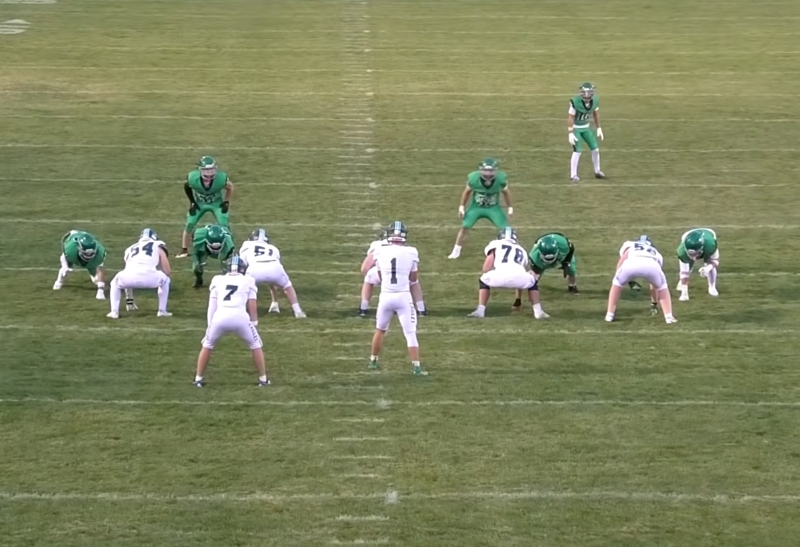
A missed third-down adjustment is hard enough to correct on Monday. It is far harder when the video is shaky, too dark, cropped too tightly, or filmed from an angle that hides the coverage. For football staffs, video quality is not a cosmetic upgrade. It determines whether coaches can identify leverage, confirm personnel, evaluate technique, and get useful replay information when the game is moving fast.
The best football video does not have to look like a television broadcast. It has to show the whole play clearly, hold steady from snap to whistle, and fit the workflow your staff already uses. That standard comes from the right filming position and equipment that works every time, not from chasing the biggest resolution number on a camera box.
In football, usable video quality is the combination of clarity, angle, stability, exposure, and consistency. Resolution matters, but it is only one part of the result. A 4K camera placed too low or mounted on an unstable pole can produce less useful footage than a well-positioned 1080p camera with a steady view of the entire formation.
Coaches need to see the information that drives decisions. From the end zone, that often means offensive line spacing, front structure, run fits, linebacker flow, and safety rotation. From the press box, it means formation recognition, route distribution, coverage shell, special teams lanes, and the full context of the play.
A good system gives each angle a job. The end-zone view provides depth and a clear read on the box. The sideline or press-box view provides width and formation context. When both angles are stable, consistently framed, and easy to upload, they become a dependable teaching and scouting resource rather than another task for the video staff.
Higher resolution can help coaches zoom in after the play, especially when reviewing line play, tackling mechanics, or special teams assignments. But resolution cannot repair a poor camera position. If the ball disappears behind players, the frame cuts off the widest receiver, or the image shakes at the snap, more pixels will not solve the problem.
Start by getting the angle right. Then select a camera and lens combination that produces a clean, detailed image at the distance you film from. For most programs, reliable full-HD capture remains highly effective for coaching, while higher-resolution footage can provide additional flexibility when storage, upload time, and platform requirements support it.
The most common issue with football filming is not the camera itself. It is the view. A camera that sits only a few feet above the field can lose the ball behind linemen, backs, and officials. It can also flatten the action, making it difficult to judge gaps, pursuit angles, and defensive structure.
Elevation gives coaches a cleaner picture. A 25-foot end-zone camera position creates the depth needed to see plays develop through the line of scrimmage. A properly set press-box tripod gives the sideline angle enough height to keep the formation and routes in view. For practice, a 10-foot pole can provide a meaningful improvement over handheld or ground-level filming without turning setup into a major operation.
More height is not automatically better. The camera needs to be high enough to see over traffic but stable enough to avoid movement in wind or during routine operation. It also needs a safe, repeatable setup process. A system that produces a great angle but takes 30 minutes and multiple people to deploy will not be used consistently on a busy game day.
Shaky video wears out its value quickly. A coach trying to evaluate a tackle or diagnose a protection should not have to fight constant vibration, sudden pans, or a drifting horizon. Stability is especially important at tall camera heights, where small movements at the base can become major movement in the image.
A football filming setup needs a strong tripod foundation, secure connections, and controls that allow the operator to make deliberate adjustments. This is where simple engineering often beats unnecessary complexity. Motorized and wireless systems may sound convenient, but they add batteries, pairing, signal interference, software issues, and more potential failure points.
Manual controls give an operator direct command of the camera. When the offense breaks the huddle or a punt team takes the field, the operator can frame the shot, adjust as needed, and keep filming without waiting on an app or troubleshooting a connection. For many high school programs, that reliability matters more than a feature that looks impressive in a product demonstration.
A close shot can look dramatic, but football analysis requires context. For a standard offensive snap, the frame should generally include the full formation before the snap and remain wide enough to capture the play as it develops. That means avoiding unnecessary zooming and letting the action move within a stable frame.
The end-zone angle should show the offensive line, backfield, and enough of the secondary to identify fit and support. The sideline angle should include the widest relevant players and enough downfield space to evaluate routes, coverage, and pursuit. The exact framing depends on age level, field position, and offensive style, but the principle stays the same: do not sacrifice coaching information for a tighter-looking shot.
Friday nights create difficult lighting conditions. A field may have bright lights in one end zone and dark corners in the other. Afternoon games can produce hard shadows, glare, or a low sun directly behind the offense. Weather adds another layer, from rain on the lens to wind that challenges tall equipment.
Good optics help a camera hold detail and color in changing conditions. Just as important, the system should allow the operator to make practical exposure and focus adjustments without guessing through a complicated menu. Automatic settings are useful when they work, but football operators need to recognize when the camera is being fooled by a bright scoreboard, dark jerseys, or stadium lights.
Before kickoff, record a short test clip from each filming location. Review it on the camera or monitoring device and look for blown-out lights, overly dark players, soft focus, or a frame that sits too low. Correcting those issues before the first series is much easier than discovering them during film breakdown.
The right video settings depend on how your program uses the footage. If video must reach a sideline replay platform quickly, file size, connection speed, and compatibility matter alongside image detail. A larger file can look better, but it may take longer to transfer or create delays when coaches need the angle now.
Frame rate also depends on the job. Standard frame rates are often sufficient for routine game film and scouting. A higher frame rate can be helpful for slow-motion evaluation of footwork, releases, ball security, and contact, but it increases data demands. There is no benefit to selecting a demanding format if it slows the workflow or exceeds what the replay platform can process efficiently.
Build a repeatable preset for games and another for practice. Once the staff knows the correct resolution, frame rate, focus approach, and exposure starting point, setup becomes faster and mistakes become less likely. Consistency matters when different managers, assistants, or players may operate the system during the season.
Video quality can fall apart before the camera ever starts recording. A loose mount, low battery, dirty lens, missing cable, or unstable tripod can turn a capable system into an unusable one. The solution is not a longer pregame checklist that nobody follows. It is a simple process with equipment designed for fast deployment.
Keep lenses clean, batteries charged, and storage media ready before travel. Confirm that the camera is level, all locks are secure, and the viewing device has a clear picture. At the field, establish a standard setup order: tripod first, pole or camera mount second, camera third, framing test last. The operator should know exactly where the equipment belongs and how the finished shot should look.
Game Day Endzone systems are built around that practical reality: professional-level football angles, stable tripod engineering, portable components, and manual operation that does not depend on a wireless connection behaving perfectly under pressure.
The strongest football video programs treat filming as part of game operations, not an afterthought assigned five minutes before kickoff. Give one person ownership of each angle, define the desired framing, and test the workflow before the season starts. If your staff uses Hudl Sideline, EDGE Replay, Game Strat, SkyCoach, or another platform, run a full practice transfer before the first game.
When equipment is stable, the camera is elevated, and the operator has a clear routine, video becomes more than a record of the night. It becomes a clear teaching tool that helps your players see the details they need to improve on the next rep.